Welcome to our guide on how to make slime! Whether you’re a parent looking for a fun activity to do with your child or simply someone who loves getting creative, making slime is a popular and enjoyable activity. Not only is it a fun and satisfying sensory experience, but it also has the potential to boost your child’s fine motor skills and creativity. In this step-by-step tutorial, we will walk you through the process of making slime, using easy-to-find ingredients and simple instructions. Get ready to have some gooey, stretchy, and colorful fun as we show you how to make slime!
Step-by-Step Guide: How to Make Slime at Home”
Introduction:
Slime has become a popular DIY project for kids and adults alike. It’s a fun and easy way to create a squishy, stretchy, and colorful substance that can provide hours of entertainment. If you’re interested in making slime at home, follow this step-by-step guide for a successful and gooey result.
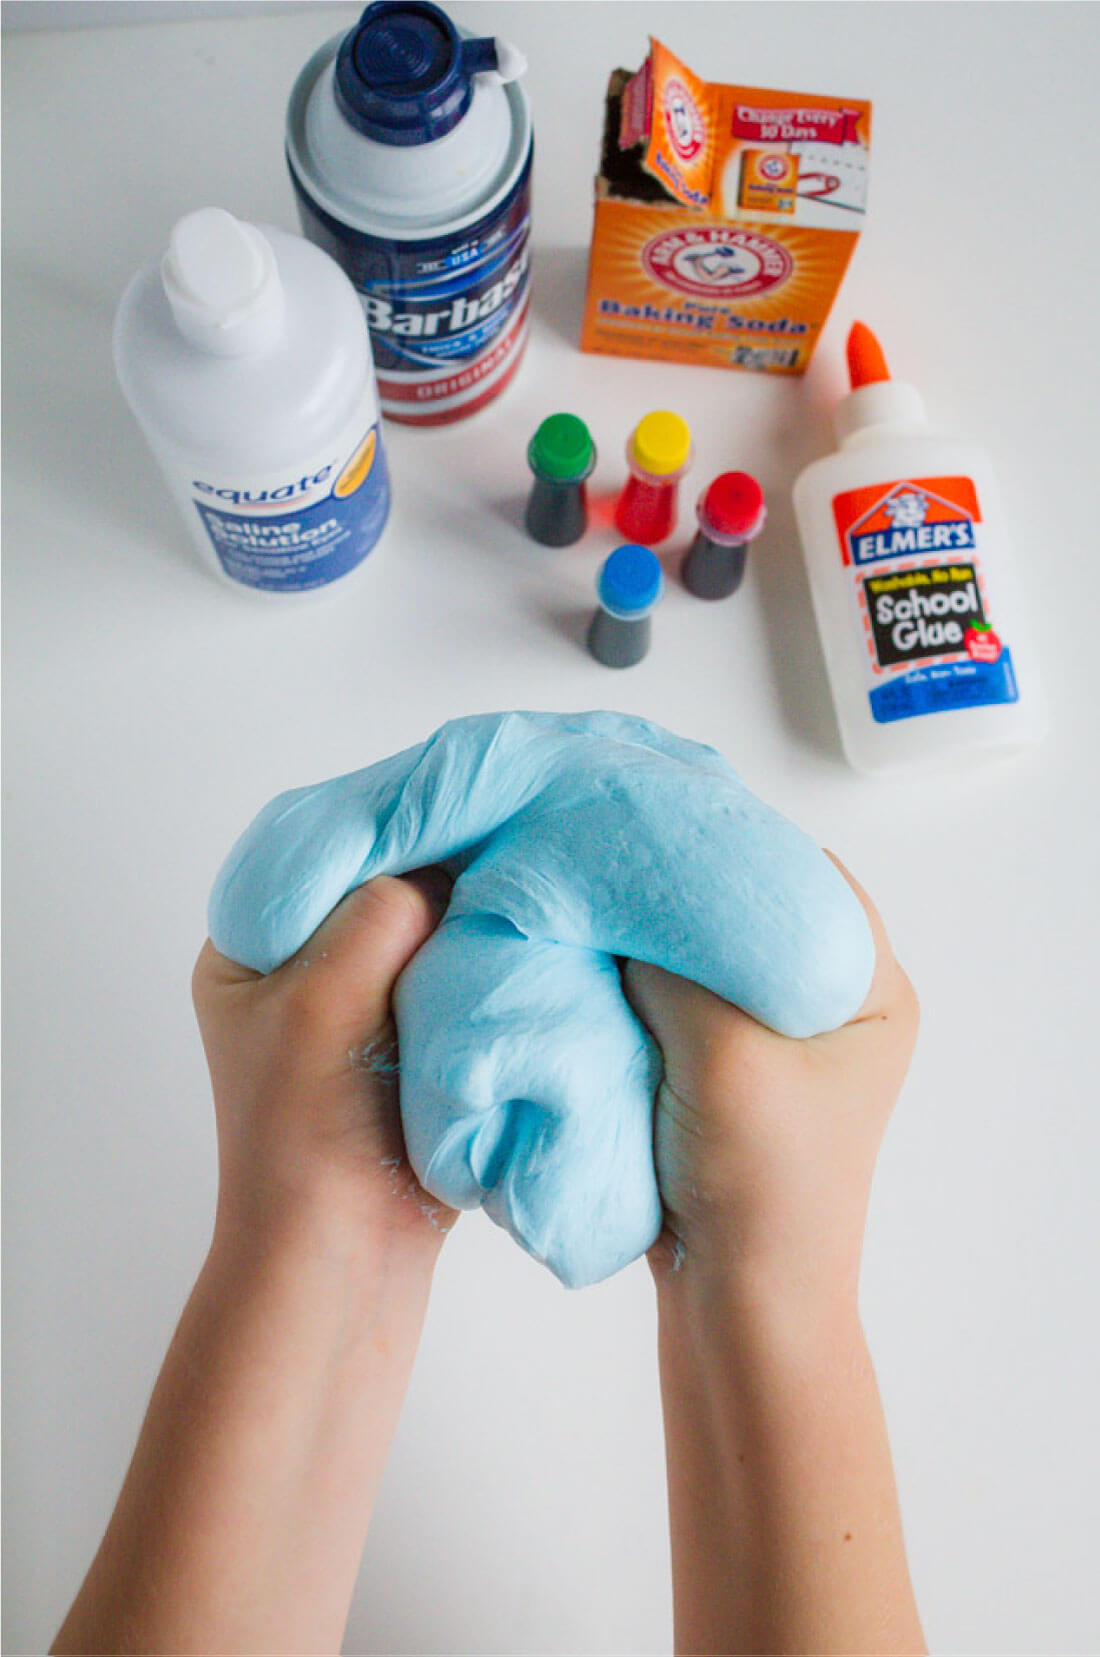
Materials:
– 1 cup of white school glue
– 1 cup of water
– 1 teaspoon of baking soda
– Food coloring of your choice
– Contact lens solution
– Mixing bowl
– Measuring cups and spoons
– Spoon or spatula for mixing
– Airtight container for storage
Step 1: Prepare your workspace
Before starting, make sure you have a clean and flat workspace to work on. Lay down some old newspapers or a plastic mat to protect your surface from any spills or messes.
Step 2: Mix glue and water
In a mixing bowl, combine 1 cup of white school glue and 1 cup of water. Use a spoon or spatula to mix them together until they are well combined.
Step 3: Add baking soda
Next, add 1 teaspoon of baking soda to the glue and water mixture. This will help give your slime its stretchy and squishy texture.
Step 4: Choose your color
Now it’s time to add some color to your slime. You can use food coloring of your choice to create any color you want. Start with a few drops and mix it in. Keep adding more until you reach your desired color.
Step 5: Add contact lens solution
The next ingredient is crucial in making your slime come together. Add a small amount of contact lens solution to the mixture and stir it well. You will start to see the slime form and thicken. Keep adding a few drops at a time and stir until the slime is no longer sticky.
Step 6: Knead the slime
Once the slime has formed, it’s time to get your hands dirty. Take the slime out of the bowl and start kneading it with your hands. This will help make the slime stretchy and less sticky. If it’s still too sticky, add a few more drops of contact lens solution.
Step 7: Store the slime
Once your slime has reached the desired consistency, store it in an airtight container. This will help keep it fresh and prevent it from drying out.
Tips:
– If your slime turns out too hard, add a little bit of water and knead it until it softens.
– You can add glitter or small toys to your slime for some extra fun.
– Make sure to wash your hands after playing with the slime to avoid any irritation.
Congratulations, you have successfully made your own slime at home! Now you can stretch, squish, and play with your homemade creation. Remember to store it properly to keep it fresh and have fun experimenting with different colors and add-ins.
Easy and Fun: Learn How to Make Slime in Just a Few Steps”
Slime has become a popular trend among kids and adults alike. It’s a fun and easy activity that can keep you entertained for hours. Not only is it a great way to pass the time, but it’s also a science experiment that teaches you about the properties of different materials. In this guide, we’ll show you how to make slime in just a few simple steps.
Step 1: Gather your materials
Before you begin, make sure you have all the necessary materials on hand. You will need:
– 1 cup of white glue
– 1 cup of water
– Food coloring (optional)
– 1 teaspoon of borax
– 1 cup of warm water
– Measuring cups and spoons
– Mixing bowl
– Spoon
Step 2: Mix the glue and water
In a mixing bowl, combine 1 cup of white glue with 1 cup of water. If you want to add color to your slime, now is the time to add a few drops of food coloring. Mix well until the color is evenly distributed.
Step 3: Make the borax solution
In a separate bowl, mix 1 teaspoon of borax with 1 cup of warm water. Stir until the borax is completely dissolved.
Step 4: Combine the two mixtures
Slowly pour the borax solution into the glue mixture, stirring constantly. As you mix, you will notice the slime starting to form. Keep stirring until the mixture becomes too thick to stir with a spoon.
Step 5: Knead the slime
Take the slime out of the bowl and start kneading it with your hands. This will help distribute the borax solution evenly and make the slime less sticky. If the slime is still too sticky, you can add a small amount of borax solution and continue kneading until you reach the desired consistency.
Step 6: Have fun with your slime
Now that your slime is ready, it’s time to have some fun! You can stretch it, squish it, and mold it into different shapes. You can even add small toys or glitter for a more personalized touch.
Step 7: Store your slime
When you’re done playing with your slime, store it in an airtight container to keep it from drying out. It can last for weeks if properly stored.
Tips for success:
– If your slime is too sticky, add a little more borax solution and continue kneading until it’s less sticky.
– If your slime is too hard, add a little more water and knead until it softens.
– Experiment with different colors and add-ins to make your slime unique.
– Be sure to wash your hands after playing with slime, as it can leave a residue on your skin.
In conclusion, making slime is a fun and easy activity that anyone can do. With just a few simple steps, you can create your own colorful and stretchy slime. So gather your materials, follow these steps, and get ready to have some slimy fun!
DIY Slime: How to Make Your Own at Home”
Slime has become an incredibly popular toy for children and adults alike. It’s stretchy, squishy, and satisfying to play with. But did you know that you can make your own slime at home? Not only is it a fun and creative activity, but it also allows you to customize the texture and color of your slime.
So, if you’re ready to get your hands dirty and have some gooey fun, here’s a step-by-step guide on how to make your own slime at home.
Ingredients:
– 1/2 cup of clear school glue
– 1/2 cup of liquid starch
– Food coloring (optional)
– Glitter or other add-ins (optional)
Instructions:
1. In a mixing bowl, pour 1/2 cup of clear school glue. You can use any brand, as long as it’s clear. The clear glue will give your slime a transparent and glossy look.
2. If you want to add some color to your slime, now is the time to do it. Add a few drops of food coloring to the glue and mix well. You can mix different colors to create your own unique shade.
3. Next, slowly pour in 1/2 cup of liquid starch into the glue mixture. It’s important to add the starch gradually while stirring continuously. This will prevent the slime from becoming too stiff.
4. As you mix, you will notice the slime start to form. Keep mixing until it becomes difficult to stir. At this point, you may need to use your hands to knead the slime and incorporate all the ingredients.
5. If the slime is too sticky, you can add a little more liquid starch. If it’s too stiff, add a little more glue. Keep adjusting the ingredients until you reach a desired consistency.
6. Once you have your slime at the right consistency, you can add in any desired add-ins. Glitter, foam beads, or small toys are popular choices. Mix them into the slime until they are evenly distributed.
7. Your slime is now ready to be played with! Store it in an airtight container when not in use to keep it from drying out.
Tips:
– If you don’t have liquid starch, you can use a mixture of equal parts water and borax instead.
– You can also use white school glue instead of clear, but the end result will be opaque rather than transparent.
– If you want to make a larger batch of slime, simply double or triple the ingredients.
– Adding too much food coloring can stain your hands, so wear gloves if you’re concerned about this.
– If you accidentally make your slime too stiff, you can add a little bit of water to soften it up.
Now that you know how to make your own slime, the possibilities are endless. You can experiment with different colors, textures, and add-ins to create your own unique slime creations. So go ahead and get creative, and enjoy the satisfaction of playing with your homemade slime!In conclusion, learning how to make slime is a fun and creative activity that can be enjoyed by people of all ages. By following the simple steps outlined above, you can make your own slime at home using common household ingredients. Not only is it a great way to pass the time, but it also provides a hands-on learning experience and promotes sensory play for children. Get ready to dive into the world of slime-making and let your imagination run wild! Remember to share your creations with others and spread the joy of slime-making. Happy sliming!
