image source: https://ar.inspiredpencil.com
Are you looking to capture the breathtaking beauty of an eclipse in photos? Look no further! In this guide, we will provide you with all the necessary tips and tricks on how to take stunning pictures of the eclipse. Whether you’re a professional photographer or just starting out, our step-by-step instructions will help you capture this rare phenomenon in all its glory. So grab your camera and get ready to learn how to take pictures of the eclipse like a pro!
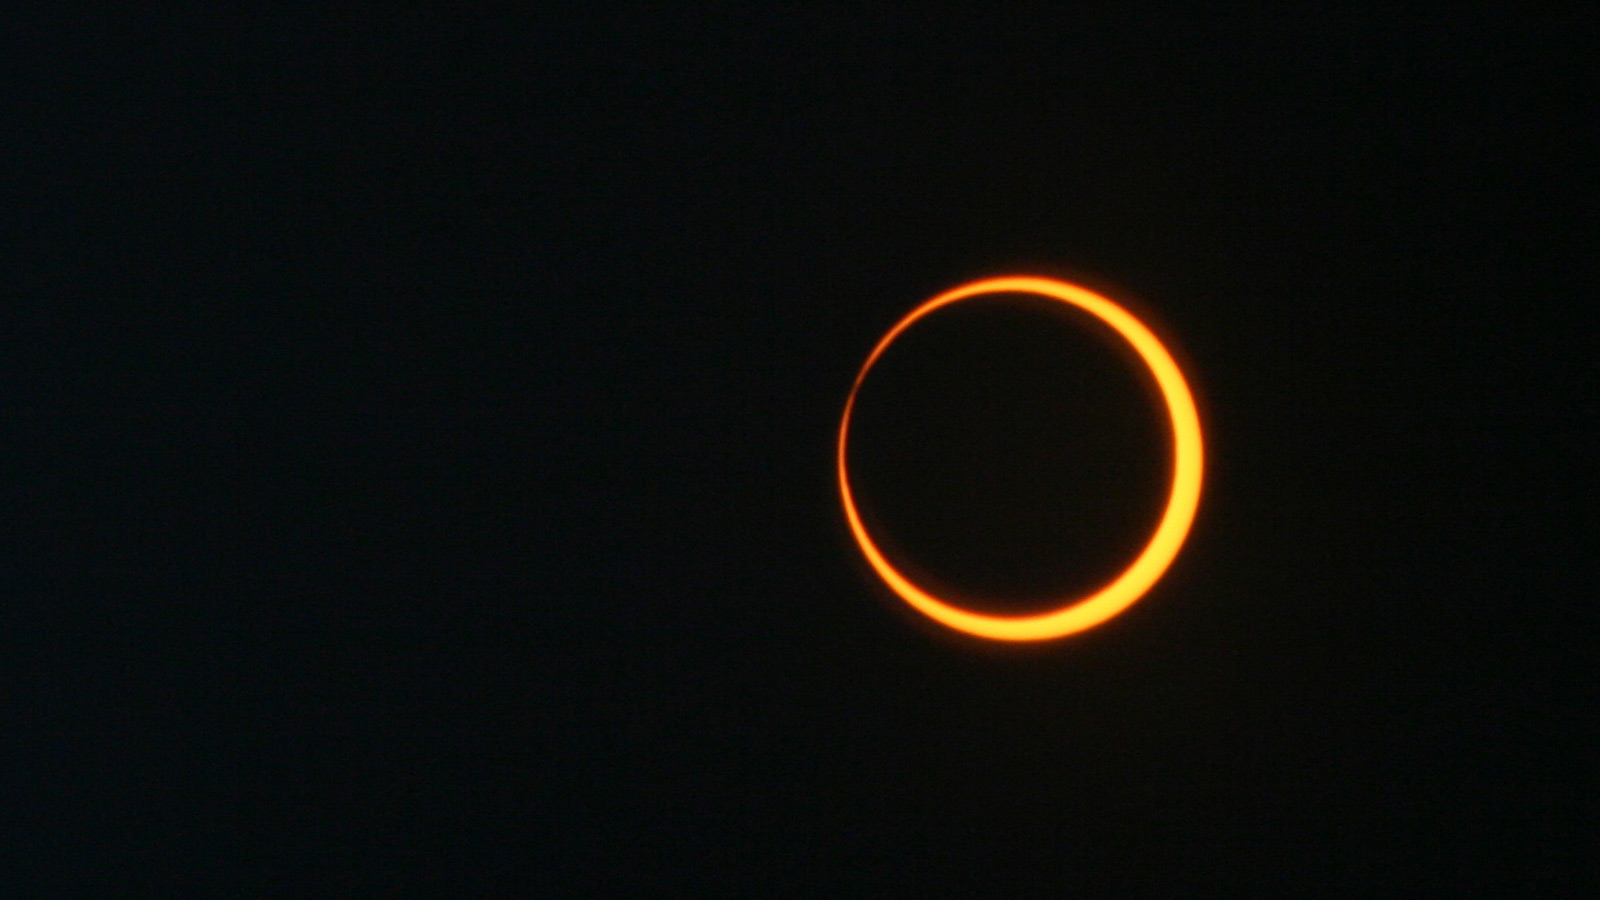
Capturing the Eclipse: A Guide on How to Take Pictures of the Celestial Event
.
The solar eclipse is a rare and awe-inspiring event that has captivated humans for centuries. With the next total solar eclipse visible in North America just around the corner, many people are eager to capture this celestial phenomenon through photography. However, photographing an eclipse can be a challenging task, requiring careful planning and specialized equipment. In this guide, we will provide you with all the information you need to successfully capture the eclipse in all its grandeur.
Preparation:
Before the day of the eclipse, it is essential to plan ahead and prepare your equipment. Here are some steps you should take to ensure a successful photoshoot:
1. Research the eclipse: It is crucial to know when and where the eclipse will be visible to get the best shots. There are many online resources and apps that can help you track the eclipse’s path and timing.
2. Choose your location: The location you choose to photograph the eclipse from can make a significant difference in the quality of your photos. Look for a spot with a clear view of the sky, away from any obstructions like buildings or trees.
3. Test your equipment: Make sure to test your camera and lenses beforehand to ensure they are in good working condition. It is also a good idea to familiarize yourself with your camera’s settings and features.
4. Get the right gear: To capture a solar eclipse, you will need specialized equipment, including a solar filter for your camera lens. This filter will protect your eyes and camera from the sun’s harmful rays and allow you to capture the eclipse without damaging your equipment.
5. Use a tripod: A tripod is essential for keeping your camera stable and avoiding blurry photos. Make sure to bring a sturdy tripod and practice setting it up before the eclipse.
Shooting the Eclipse:
On the day of the eclipse, it is essential to arrive at your chosen location early to set up your equipment and find the best spot to capture the event. Here are some tips to help you get the perfect shot:
1. Begin with wide-angle shots: As the eclipse progresses, start by taking wide-angle shots to capture the sun and the surrounding landscape. This will give you a sense of the eclipse’s scale and context.
2. Use a telephoto lens: As the eclipse reaches totality, you can switch to a telephoto lens to capture close-up shots of the sun’s corona. This is the most striking and rare part of the eclipse, so make sure to have your camera ready.
3. Experiment with different settings: The changing light conditions during an eclipse can be challenging to capture. Experiment with different camera settings, such as exposure time and ISO, to find the best balance for your photos.
4. Take multiple shots: The eclipse is a fast-moving event, so make sure to take multiple shots at different intervals. This will increase your chances of getting the perfect shot and capturing the eclipse’s different stages.
5. Protect your eyes and equipment: Never look directly at the sun without proper eye protection, and make sure to use your solar filter at all times when photographing the eclipse. Also, keep your equipment out of direct sunlight to prevent damage.
Post-Processing:
Once you have captured the eclipse, it is time to edit and enhance your photos. Here are some tips for post-processing:
1. Use editing software: There are many editing software options available, such as Adobe Lightroom or Photoshop, that can help you enhance your photos and bring out the eclipse’s details.
2.
Unlocking the Secrets of Eclipse Photography: Tips on How to Take Amazing Pictures
Eclipse photography is a fascinating and challenging pursuit that requires skill, patience, and the right equipment. Whether you are a professional photographer or a hobbyist, capturing the stunning visuals of an eclipse can be a rewarding and memorable experience. However, it is not as simple as pointing your camera at the sky and clicking away. There are various factors to consider and techniques to master in order to take truly amazing eclipse photos. In this guide, we will unlock the secrets of eclipse photography and provide you with tips on how to capture breathtaking images of this celestial event.
1. Plan Ahead
The first step to successful eclipse photography is planning. You need to research and gather information about the eclipse you wish to photograph, such as its date, time, location, and duration. This will help you choose the right equipment and settings for your photos. Check weather forecasts and make sure you are prepared for any potential obstacles, such as clouds or rain.
2. Use the Right Equipment
Having the right equipment is crucial for eclipse photography. A digital single-lens reflex (DSLR) camera with manual settings is ideal, as it allows you to adjust the aperture, shutter speed, and ISO to capture the perfect shot. A telephoto lens with a focal length of at least 200mm is recommended to capture the details of the eclipse. You will also need a sturdy tripod to keep your camera steady and avoid blurry images.
3. Protect Your Eyes and Your Equipment
It is essential to protect your eyes and your camera during an eclipse. Looking directly at the sun can cause serious damage to your eyes, so always use proper solar filters or eclipse glasses when photographing an eclipse. Additionally, using a solar filter on your camera lens will prevent damage to your equipment and ensure that your photos are not overexposed.
4. Experiment with Exposure Settings
One of the most crucial aspects of eclipse photography is getting the exposure right. Since an eclipse involves a dark object (the moon) moving in front of a bright object (the sun), it can be challenging to get the exposure just right. Start by setting your camera to manual mode and adjusting the aperture and shutter speed to get a good exposure of the sun. As the eclipse progresses, you may need to make adjustments to compensate for changes in lighting.
5. Incorporate the Surrounding Environment
Don’t just focus on the eclipse itself; try to incorporate the surrounding environment into your photos. Including elements such as trees, buildings, or people can add depth and interest to your images. You can also experiment with different angles and perspectives to capture unique and stunning shots.
6. Be Patient and Keep Shooting
Eclipse photography requires patience and persistence. Not every photo will turn out perfectly, but don’t give up. Keep shooting and try different settings and compositions to capture the best possible images. Be mindful of the changing lighting conditions and make adjustments as needed.
7. Post-Processing
Post-processing can enhance your eclipse photos and bring out their full potential. You can use editing software to adjust the colors, contrast, and sharpness of your images. However, be careful not to overdo it and make sure your photos still look natural.
In conclusion, eclipse photography is a challenging but rewarding pursuit. By planning ahead, using the right equipment, and experimenting with different techniques, you can capture amazing images of this spectacular celestial event. Remember to always prioritize your safety and the safety of your equipment, and don’t be afraid to get creative and have fun with your
Mastering the Art of Eclipse Photography: A Step-by-Step Guide on How to Take Pictures
Introduction
Eclipse photography is a challenging yet rewarding form of photography that requires a precise technique and specialized equipment. The ability to capture the beauty and wonder of a solar or lunar eclipse through photography allows us to preserve these rare and awe-inspiring events for generations to come. In this guide, we will walk you through the essential steps to master the art of eclipse photography.
Step 1: Know the Types of Eclipses
Before you can capture an eclipse through photography, it is crucial to understand the different types of eclipses. A solar eclipse occurs when the moon passes between the sun and the Earth, casting a shadow on the Earth’s surface. A lunar eclipse, on the other hand, occurs when the Earth passes between the sun and the moon, blocking the sunlight from reaching the moon. Knowing the type of eclipse will help you plan your photography equipment and techniques accordingly.
Step 2: Prepare Your Equipment
To capture a clear and crisp photo of an eclipse, you will need specialized equipment. The most critical piece of equipment is a solar filter that fits your camera lens. This filter will protect your eyes and camera from the intense sunlight during a solar eclipse. For a lunar eclipse, a tripod, and a telephoto lens are necessary to capture the moon’s details.
Step 3: Choose the Right Location
The location you choose to photograph an eclipse can make a significant difference in the quality of your photos. Ideally, you want to be in an area with minimal light pollution and a clear view of the sky. A high vantage point, such as a hill or mountain, can also provide a better view of the eclipse.
Step 4: Practice with Your Camera Settings
To capture an eclipse successfully, you must be familiar with your camera’s settings and how to adjust them for different lighting conditions. Before the eclipse, practice taking photos in various lighting situations to determine the best settings for your camera.
Step 5: Set Up Your Equipment
On the day of the eclipse, arrive early at your chosen location to set up your equipment. Attach the solar filter to your camera lens and ensure it is secure. If you are using a tripod, make sure it is on stable ground and adjust it to the desired height. If you are photographing a lunar eclipse, use your telephoto lens and adjust the focus to capture the moon’s details.
Step 6: Take Test Shots
Before the eclipse begins, take some test shots to ensure your camera settings are correct and your equipment is working correctly. Adjust the settings if necessary, and take a few more test shots until you are satisfied with the results.
Step 7: Capture the Eclipse
As the eclipse begins, continue taking photos at regular intervals, adjusting your settings as needed. Be mindful of the changing lighting conditions and adjust your ISO, aperture, and shutter speed accordingly. Experiment with different angles and compositions to capture unique and stunning shots.
Step 8: Protect Your Eyes
While taking photos of a solar eclipse, it is essential to protect your eyes from the intense sunlight. Never look directly at the sun without proper eye protection, even through your camera’s viewfinder. Use a solar filter or eclipse glasses to view the eclipse safely.
Step 9: Post-Processing
Once the eclipse is over, transfer your photos to your computer and review them. Use photo editing software to enhance the colors and contrast, if necessary. Be careful not to over-edit your photos, as it can distort the natural beauty ofIn conclusion, capturing breathtaking images of the eclipse is an experience that requires proper planning, equipment, and technique. By following these tips and guidelines, you can ensure that you are able to take stunning pictures of the eclipse and create lasting memories. Remember to always prioritize safety and never look directly at the sun without proper eye protection. With careful preparation and a bit of luck, you can successfully capture the beauty and wonder of the eclipse in your photographs. Happy shooting!
