Are you looking for a way to recall an email in Outlook? Look no further! In this article, we will guide you through the step-by-step process of recalling an email in Outlook. Whether you sent a message by mistake or need to make changes to the content, we’ve got you covered. Keep reading to learn how to recall email in Outlook and avoid any potential mishaps.
Master the Art of Recalling Emails in Outlook: A Step-by-Step Guide
Introduction:
Email communication has become an essential part of our daily lives, both in personal and professional settings. However, we’ve all experienced that moment of panic after sending an email with a mistake or to the wrong recipient. In those situations, the ability to recall an email can be a lifesaver. Microsoft Outlook offers a useful feature that allows users to recall emails, and in this guide, we will walk you through the steps to master this art.
Step 1: Enable the “Undo Send” feature
Before you can recall an email, you need to make sure the “Undo Send” feature is enabled in your Outlook settings. To do this, go to File > Options > Mail and scroll down to the “Undo Send” section. Check the box next to “Enable Undo Send” and set the desired time limit for recalling emails (the default is 10 seconds).
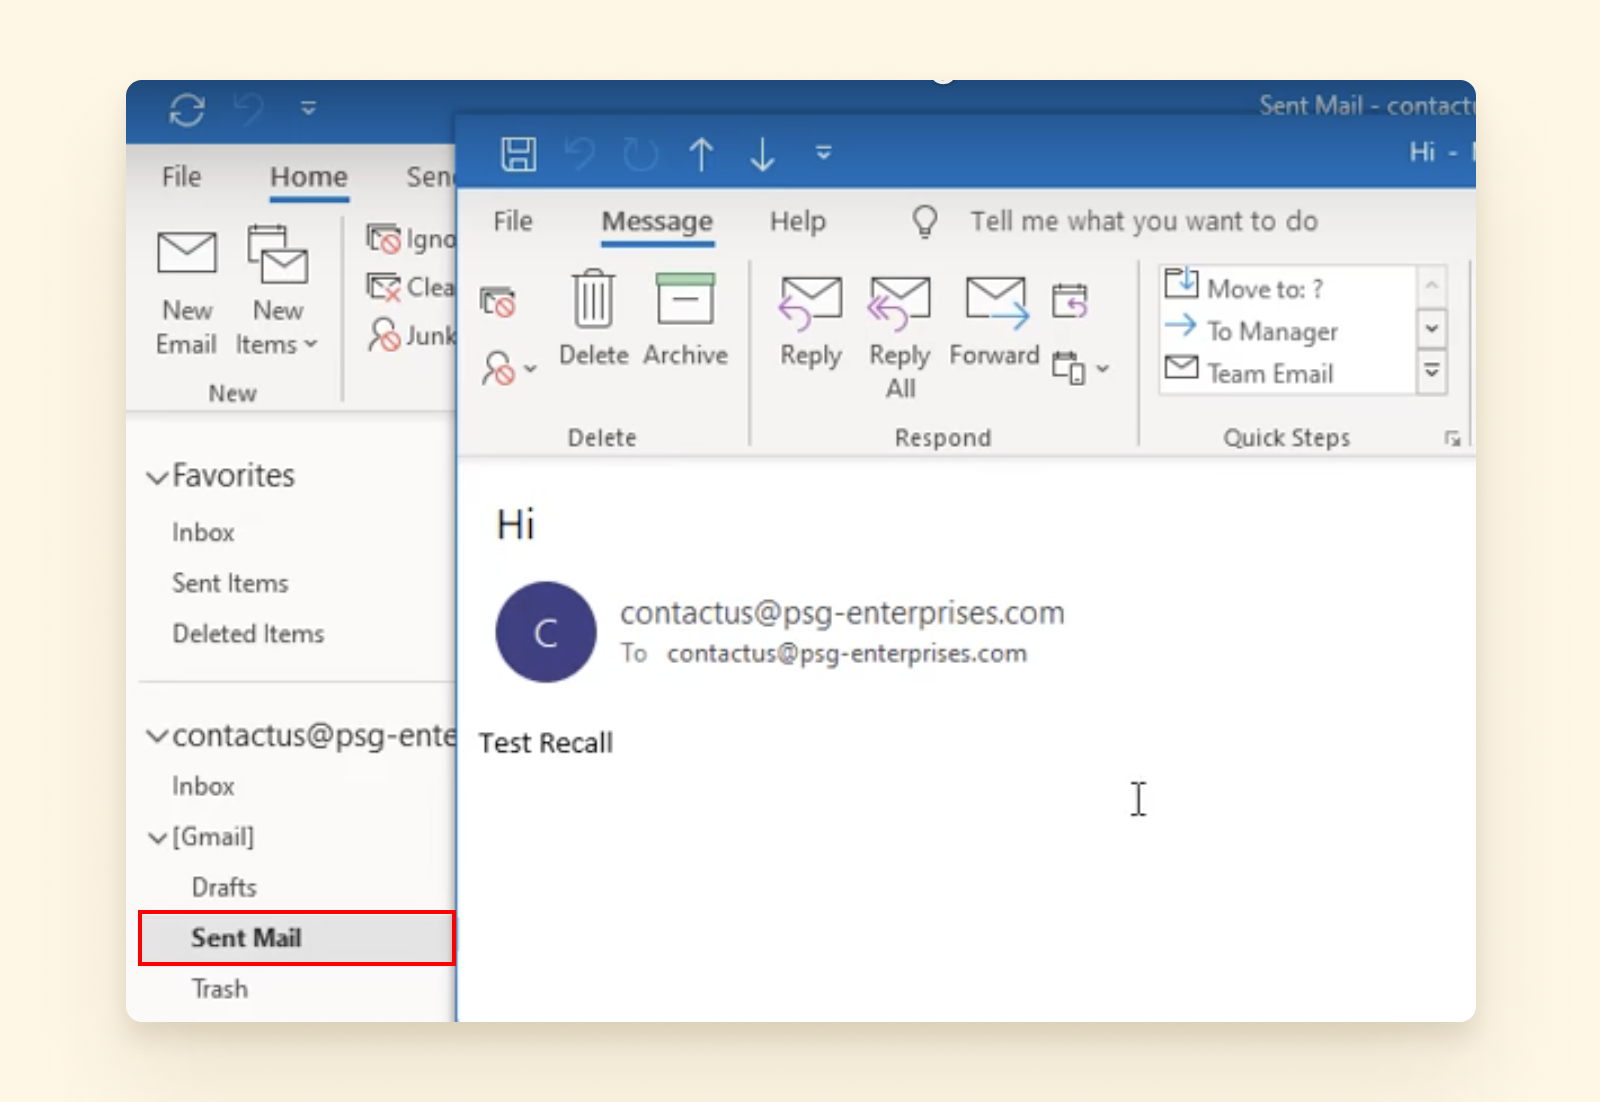
Step 2: Open the Sent Items folder
Once the “Undo Send” feature is enabled, open the Sent Items folder in Outlook. This folder contains all the emails you have sent.
Step 3: Open the email you want to recall
Find the email you want to recall and open it by double-clicking on it. The email will open in a new window.
Step 4: Click on the “Actions” tab
In the new window, click on the “Actions” tab at the top of the screen. This tab contains various options for managing your email, including the ability to recall it.
Step 5: Select “Recall This Message”
Under the “Actions” tab, select “Recall This Message” from the drop-down menu. A pop-up window will appear with two options: “Delete unread copies of this message” and “Delete unread copies and replace with a new message.” Choose the option that suits your needs.
Step 6: Click “OK”
After selecting your preferred option, click “OK.” If you chose to replace the email with a new one, a new window will open, allowing you to make the necessary changes and resend the email.
Step 7: Check the status of the recall
Once the recall process is complete, you will receive a notification in your inbox informing you of the status. If the recall is successful, the email will be deleted from the recipient’s inbox. However, if the email has already been read, the recall will not work.
Step 8: Follow up with a new email
If the recall was unsuccessful, you can follow up with a new email explaining the situation or correcting any mistakes. It’s essential to communicate effectively and professionally in these situations.
Conclusion:
Mastering the art of recalling emails in Outlook can save you from potential embarrassment or miscommunication. However, it’s essential to remember that this feature is not always foolproof and may not work in all situations. It’s always best to double-check your emails before sending them to avoid any mishaps. We hope this guide has been helpful, and with practice, you’ll become a pro at recalling emails in no time.
Effortless Email Management: How to Recall Messages in Outlook
Email management is an essential skill in today’s fast-paced business world. With the constant influx of emails, it can be easy to make mistakes and send a message that you didn’t intend to. Fortunately, Microsoft Outlook has a useful feature that allows you to recall messages that you have sent by mistake. This can save you from potential embarrassment or damage to your professional reputation. In this article, we will discuss how to recall messages in Outlook, making email management effortless for you.
What is message recall?
Message recall is a feature in Outlook that allows you to retrieve an email that you have sent if the recipient has not opened it yet. This feature is available for Outlook users who are part of an Exchange Server network. It is not available for users of web-based or POP3 email services.
How to recall a message in Outlook?
To recall a message in Outlook, follow these simple steps:
1. Open your Sent Items folder.
2. Double-click on the email you want to recall to open it.
3. Click on the “Actions” tab in the top menu bar.
4. Select “Recall This Message” from the drop-down menu.
5. In the “Recall This Message” window, choose whether you want to delete the unread copies of the email or replace it with a new one.
6. If you choose to replace the email, make the necessary changes and click “Send.”
7. If you choose to delete the email, click “Delete unread copies and replace with a new message.”
8. Click “OK” to confirm the recall.
9. If the recall is successful, you will receive a notification. If it is unsuccessful, you will be notified as well.
Why should you recall a message?
There are several reasons why you may want to recall a message in Outlook:
1. You sent the email to the wrong recipient: We have all been there – accidentally sending an email to the wrong person. With message recall, you can quickly retrieve the email and send it to the correct recipient.
2. You included incorrect information: If you realize that you made a mistake in the content of your email, you can recall it and send a corrected version.
3. The email was sent in a moment of anger or frustration: We have all experienced moments of anger or frustration, and sometimes we may send an email that we regret later. With message recall, you can retrieve the email and avoid any potential conflicts or misunderstandings.
4. You want to change the email’s content: Message recall allows you to replace the original email with a new one, making it easy to correct any errors or make updates.
Tips for successful message recall
To increase the chances of a successful message recall, here are some tips to keep in mind:
1. Recall the message as soon as possible: The longer you wait to recall an email, the higher the chances that the recipient has already opened it.
2. Check if the recall was successful: After recalling the message, check your inbox for a “Message Recall Failure” notification. This will let you know if the recall was unsuccessful, and you can take further action if needed.
3. Use the “Delete unread copies and replace with a new message” option: This option ensures that the recipient will only receive the updated version of the email, avoiding any confusion.
4. Use message recall sparingly: It is best to use message recall only when absolutely necessary. Frequent recalls can be seen as unprofessional and may
Never Send a Wrong Email Again: Learn How to Recall in Outlook
In today’s fast-paced work environment, sending emails has become a necessary form of communication. With the click of a button, we can easily send important information to our colleagues, clients, and superiors. However, sometimes in the rush of our daily tasks, we may accidentally send an email to the wrong recipient, or with incorrect information. This can lead to confusion, embarrassment, and even potential consequences for our professional reputation.
Fortunately, Microsoft Outlook has a feature that can help prevent these mishaps – the ability to recall an email. In this article, we will guide you through the steps of recalling an email in Outlook, so you can avoid the stress and consequences of sending a wrong email.
Step 1: Open the Sent Items folder
After realizing that you have sent an email with incorrect information or to the wrong recipient, the first step is to open the Sent Items folder in Outlook. This is where all the emails you have sent are stored.
Step 2: Double-click on the email to open it
Locate the email that you want to recall and double-click on it to open it. This will open the email in a new window.
Step 3: Go to the Message tab
Once the email is open, go to the Message tab at the top of the window.
Step 4: Click on the Actions button
In the Message tab, click on the Actions button. A drop-down menu will appear.
Step 5: Select “Recall This Message”
From the drop-down menu, select “Recall This Message.”
Step 6: Choose the appropriate option
A new window will appear with two options – “Delete unread copies of this message” and “Delete unread copies and replace with a new message.” If you want to completely recall the email, choose the first option. If you want to replace it with a corrected version, choose the second option.
Step 7: Click on “OK”
After selecting the appropriate option, click on “OK.” The email will now be recalled.
Step 8: Check the recall status
To check the status of the recall, go to the Sent Items folder and look for a message from Outlook with the subject line “Message Recall Success” or “Message Recall Failure.” If the recall was successful, the email will be deleted from the recipient’s inbox. If it failed, the email will remain in the recipient’s inbox.
Additional tips for recalling emails:
– The recall feature only works if the recipient has not opened the email yet. If they have already opened it, the recall will not be successful.
– If the email was sent to a large group of people, the recall will only work if all recipients have not opened the email yet.
– The recall feature does not work for emails sent to external email addresses.
– If you want to recall a meeting request, you can do so by opening the meeting request from your calendar and selecting “Cancel Meeting” instead of “Recall This Message.”
In conclusion, the recall feature in Outlook can save us from the embarrassment and consequences of sending wrong emails. However, it is important to double-check our emails before sending them to avoid the need for a recall. With these simple steps, you can ensure that your emails are accurate and reach the intended recipients. So the next time you accidentally send a wrong email, remember these steps to recall it in Outlook.In conclusion, learning how to recall email in Outlook can save you from potential embarrassment or miscommunication. With the simple steps outlined above, you can easily retract an email and avoid any unwanted consequences. Make sure to follow these guidelines to effectively recall emails in Outlook and maintain a professional online presence.
