image source: https://fondepix.com
Welcome to our guide on how to put your iPhone camera in night mode! As technology continues to advance, smartphones have become our go-to devices for capturing memories and moments. With the latest iPhone models, you now have the ability to take stunning photos in low light settings with the help of night mode. In this article, we will walk you through the steps on how to activate and use night mode on your iPhone camera, allowing you to take beautiful and high-quality pictures even in the darkest of environments. So, let’s get started and unlock the full potential of your iPhone camera!
Mastering Night Mode on Your iPhone Camera: Step-by-Step Guide
Introduction
The iPhone camera has greatly evolved over the years, and one of its most impressive features is the Night Mode. This revolutionary feature allows you to take stunning photos in low-light conditions, making it perfect for capturing beautiful night scenes, portraits, and even astrophotography. However, mastering Night Mode can be a bit tricky, especially for beginners. In this guide, we will walk you through step-by-step on how to use Night Mode on your iPhone camera to take professional-looking photos in any low-light situation.
Step 1: Know When to Use Night Mode
The first step to mastering Night Mode is knowing when to use it. Night Mode is designed to enhance your photos in low-light situations, such as at night or in dimly lit environments. It is perfect for capturing cityscapes, landscapes, and even portraits in low-light conditions. You can also use it to capture the stars and the Milky Way in astrophotography.
Step 2: Access Night Mode
To access Night Mode, open your iPhone camera app and swipe left until you see the Night Mode option. The icon looks like a crescent moon. Alternatively, you can also tap on the “A” button at the top of the screen and select “Night” from the list of options.
Step 3: Use a Tripod or Stabilization
To get the best results with Night Mode, it is recommended to use a tripod or some form of stabilization. This will help eliminate any camera shake, resulting in sharp and clear images. If you don’t have a tripod, you can rest your phone on a steady surface, or use a phone grip with a built-in tripod.
Step 4: Adjust the Exposure
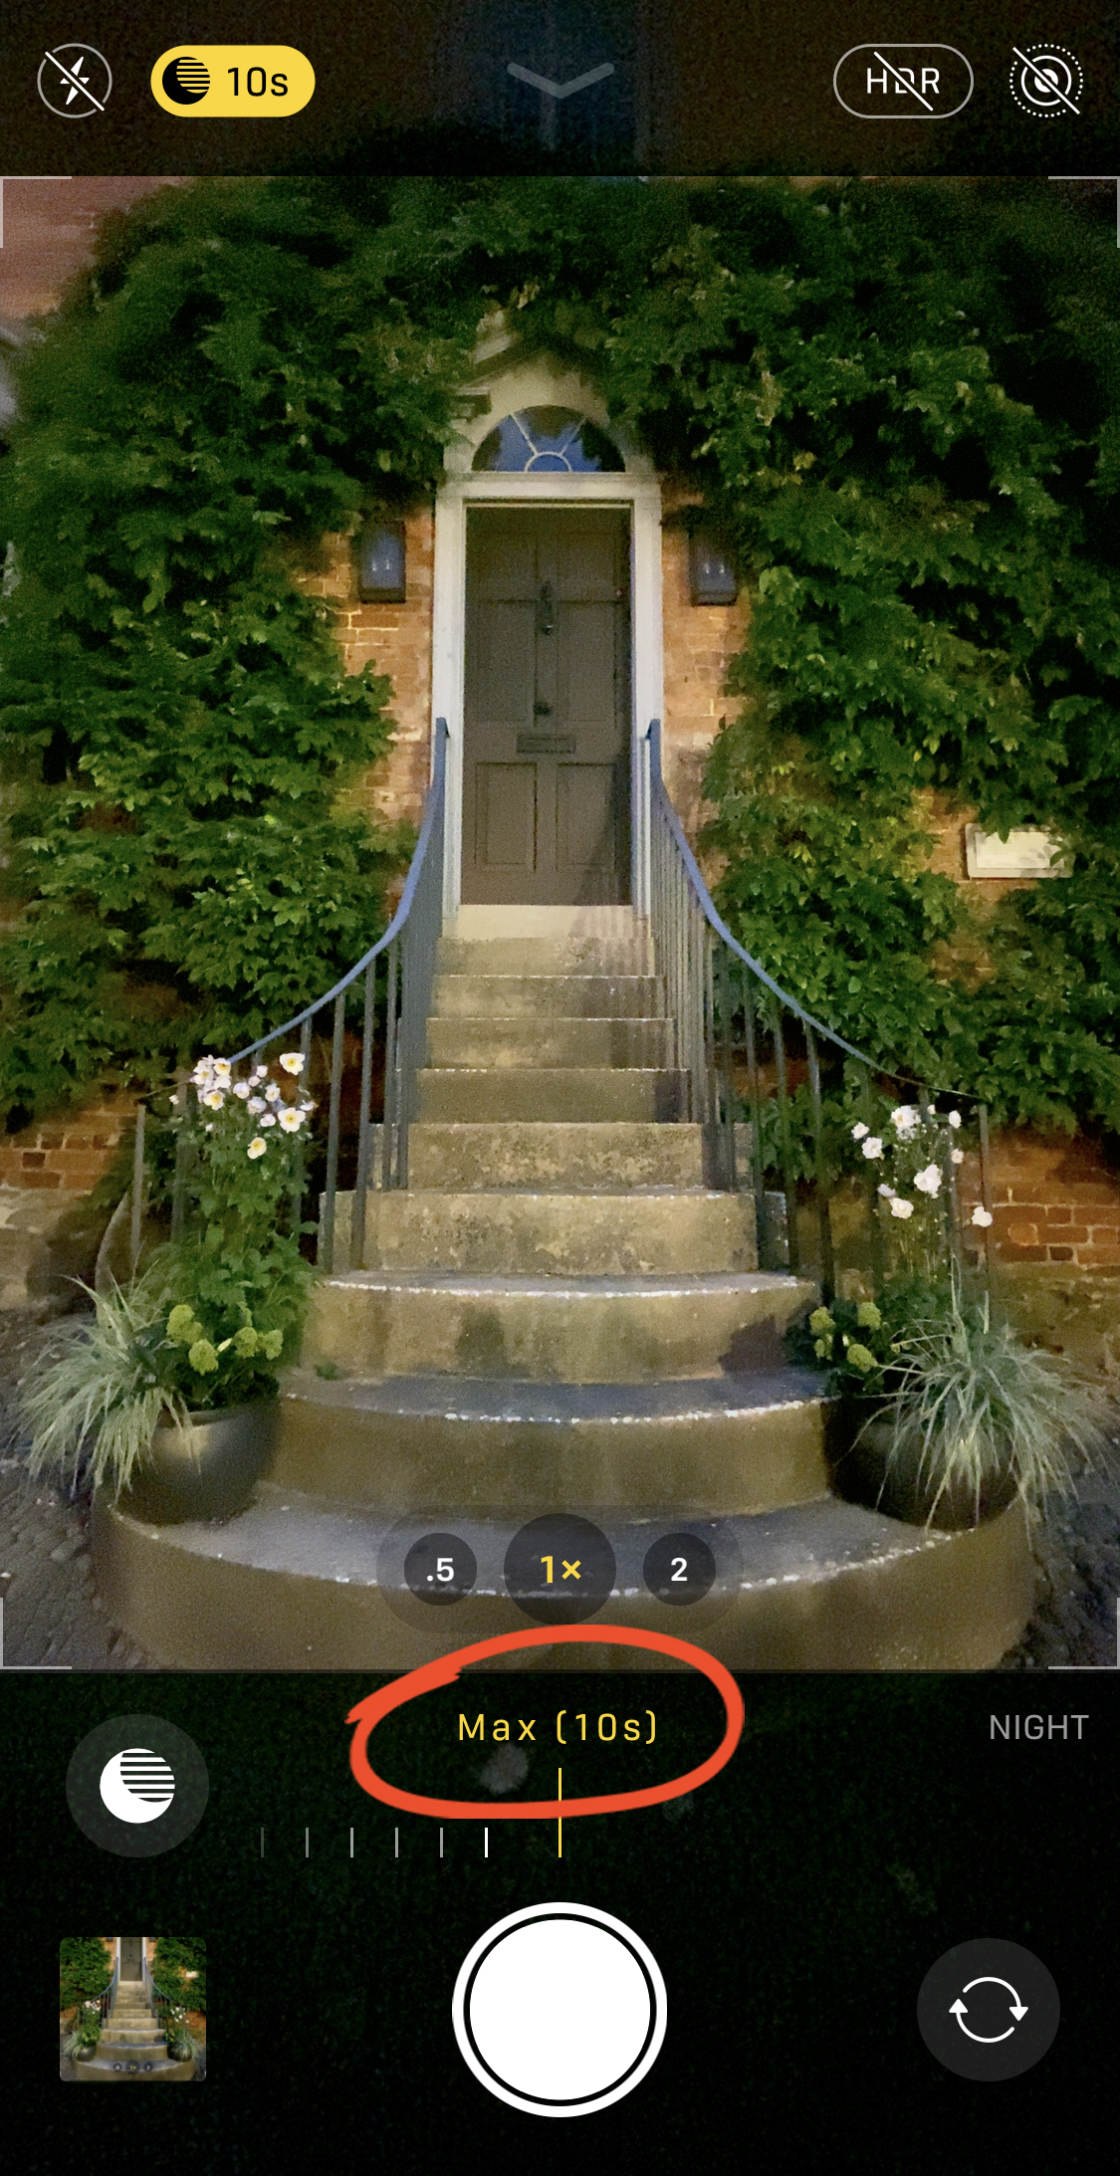
Once in Night Mode, you can adjust the exposure by dragging the slider up or down. This will determine how much light is let into the camera, so it’s important to find the right balance for your desired shot. If your photo is too bright, decrease the exposure. If it’s too dark, increase it.
Step 5: Use the Timer
Another helpful tip for getting the best results in Night Mode is to use the timer feature. This will give your phone time to stabilize before taking the photo, resulting in a sharper image. To access the timer, tap on the “clock” icon at the top of the screen and select the desired time.
Step 6: Keep Your Phone Steady
Even with a tripod or stabilization, it’s important to keep your phone as still as possible when taking a photo in Night Mode. Any movement can result in a blurry image, so try to hold your phone with both hands and avoid any sudden movements.
Step 7: Experiment with Different Subjects
Night Mode is not just limited to landscapes and cityscapes. You can also use it to capture portraits, still life, and other subjects in low-light conditions. Experiment with different subjects and see how Night Mode can enhance your photos.
Step 8: Edit Your Photos
After taking your photos in Night Mode, you can further enhance them by editing them in the Photos app. You can adjust the brightness, contrast, and add filters to give your photos a unique look. Remember to keep your edits subtle to maintain the natural look of your photo.
Conclusion
Night Mode on your iPhone camera is a powerful tool for capturing stunning photos in low-light conditions. With these steps, you can now confidently use Night Mode to take professional-looking photos in any low-light situation
Capture Stunning Shots at Night with Your iPhone Camera: A Comprehensive Tutorial
Night photography can be challenging, but with the advancements in smartphone camera technology, capturing stunning shots at night with your iPhone has become easier than ever. With a few simple techniques and some useful tips, you can create breathtaking images that will impress your friends and family. In this tutorial, we will guide you through the process of taking incredible night shots with your iPhone camera.
1. Find the Right Location
The first step to capturing stunning night shots with your iPhone is to find the right location. Look for places with interesting lighting, such as cityscapes with colorful neon signs or a well-lit street. You can also experiment with natural light sources like the moon or stars. Avoid areas with too much light pollution, as it can affect the quality of your photos.
2. Use a Tripod or Stable Surface
Night shots require longer exposure times, which means any slight movement can result in a blurry image. To avoid this, use a tripod or place your iPhone on a stable surface like a table or a wall. This will ensure that your phone stays still during the exposure.
3. Adjust Your Exposure
Your iPhone’s camera has a built-in exposure adjustment feature, which allows you to control the amount of light that enters the camera. For night photography, you’ll need to increase the exposure to capture more light. To do this, tap on the area of the screen where you want to focus, and then simply slide your finger up or down to adjust the exposure.
4. Use the Timer or a Remote Shutter
As mentioned earlier, even the slightest movement can result in a blurry image when taking night shots. To avoid this, use the timer function on your iPhone or a remote shutter. This will give you a few seconds to press the shutter button and step away from the phone, ensuring that there is no movement during the exposure.
5. Experiment with Different Camera Modes
Your iPhone’s camera has various modes that you can experiment with to capture different types of night shots. The “Night Mode” is perfect for capturing cityscapes and landscapes, as it allows for longer exposure times and captures more light. The “Portrait Mode” is great for taking portraits at night, as it uses the camera’s depth-sensing technology to create a stunning bokeh effect.
6. Avoid Using the Flash
Using the flash on your iPhone can be tempting when taking night shots, but it can often result in harsh and unnatural lighting. Instead, try using natural light sources or the available light around you to create a more natural and atmospheric image.
7. Edit Your Photos
After taking your night shots, you can enhance them further by editing them on your iPhone. The “Photos” app has built-in editing tools that allow you to adjust the brightness, contrast, and color of your images. You can also experiment with third-party editing apps for more advanced editing options.
With these tips and techniques, you can capture stunning night shots with your iPhone camera. Remember to be patient and experiment with different settings and modes to find what works best for your style and location. With practice, you’ll be able to take professional-looking night shots that will impress everyone.
Unlocking the Power of Night Mode on Your iPhone Camera: Tips and Tricks
Night mode is a feature that has been introduced in the newer models of iPhones, and it allows users to take high-quality photos even in low light conditions. This feature uses advanced technology to capture and process images in a way that enhances the overall quality and brightness of the photo. If you have this feature on your iPhone, but are not sure how to use it to its full potential, here are some tips and tricks to help you unlock the power of night mode on your iPhone camera.
1. Understand how night mode works
Before diving into using night mode, it is important to understand how it works. Night mode uses a combination of long exposure and image processing techniques to capture and enhance the details and colors in low light conditions. This means that when you take a photo in night mode, the camera will take a longer exposure time, allowing more light to enter the lens and capture more details in the scene. The camera then uses advanced algorithms to process the image and reduce noise, resulting in a brighter and clearer photo.
2. Use a tripod or stabilize your phone
Since night mode uses long exposure, any small movement or shake can result in a blurry photo. It is recommended to use a tripod or stable surface to place your phone on when using night mode. If you do not have a tripod, you can also stabilize your phone by propping it against a steady object or using your hands to hold it steady. This will ensure that your photos come out sharp and free from blur.
3. Experiment with different exposure times
In night mode, you have the option to adjust the exposure time manually, ranging from 1 second to 30 seconds. The longer the exposure time, the more light will enter the lens, resulting in a brighter photo. However, keep in mind that the longer the exposure time, the more likely it is for your photo to have motion blur. It is recommended to start with a shorter exposure time and gradually increase it until you find the right balance between brightness and sharpness in your photo.
4. Use the timer feature
To avoid any camera shake when pressing the shutter button, it is recommended to use the timer feature when taking photos in night mode. This will give your phone enough time to stabilize and take a clear photo without any movement.
5. Experiment with different subjects and angles
Night mode is not just limited to capturing landscapes or cityscapes in low light conditions. You can also use it to take creative photos of other subjects such as portraits or still life. Experiment with different angles and compositions to see how night mode can enhance the details and colors in your photos.
6. Edit your photos
After taking a photo in night mode, you can further enhance it by using editing tools on your iPhone. The Photos app has built-in editing tools that allow you to adjust the brightness, color, and other aspects of your photo. You can also use third-party editing apps for more advanced editing options.
In conclusion, night mode is a powerful feature that can greatly enhance the quality of your low light photos on your iPhone. By understanding how it works and using these tips and tricks, you can unlock the full potential of night mode and capture stunning photos in any lighting condition.In conclusion, learning how to put your iPhone camera in night mode can greatly enhance your photography skills and enable you to capture stunning images in low light settings. By following the steps mentioned above, you can easily activate night mode on your iPhone and experiment with different techniques to achieve the best results. So don’t limit your photography to just daylight hours, try out night mode and unlock a whole new world of creative possibilities with your iPhone camera.
Reference
- iPhone 15 camera: all upgrades and new features, https://www.phonearena.com/news/iphone-15-camera_id148922
- Best camera phones in 2024, https://www.tomsguide.com/us/best-phone-cameras,review-2272.html
- Google Pixel 8a vs iPhone SE (2022): Which one is the better buy?, https://www.androidauthority.com/google-pixel-8a-vs-iphone-se-3440448/
