Welcome to our guide on how to deactivate your Instagram account. Whether you’re taking a break from social media or looking to permanently delete your account, we’ll walk you through the steps to deactivate Instagram in a few simple clicks. By following our easy-to-follow instructions, you’ll be able to temporarily pause or permanently remove your profile from the popular photo-sharing platform. Read on to learn how to deactivate Instagram and take control of your online presence.
Step-by-Step Guide: How to Deactivate Your Instagram Account in Just a Few Easy Clicks
Instagram is a popular social media platform that allows users to share photos and videos with their followers. However, there may come a time when you want to take a break from the app or deactivate your account permanently. Whatever the reason may be, deactivating your Instagram account is a simple process that can be completed in just a few easy clicks. Follow this step-by-step guide to learn how to deactivate your Instagram account.
Step 1: Log into Your Instagram Account
The first step to deactivating your Instagram account is to log into your account from a web browser. You cannot deactivate your account from the Instagram app, so make sure you are using a computer or your mobile browser.
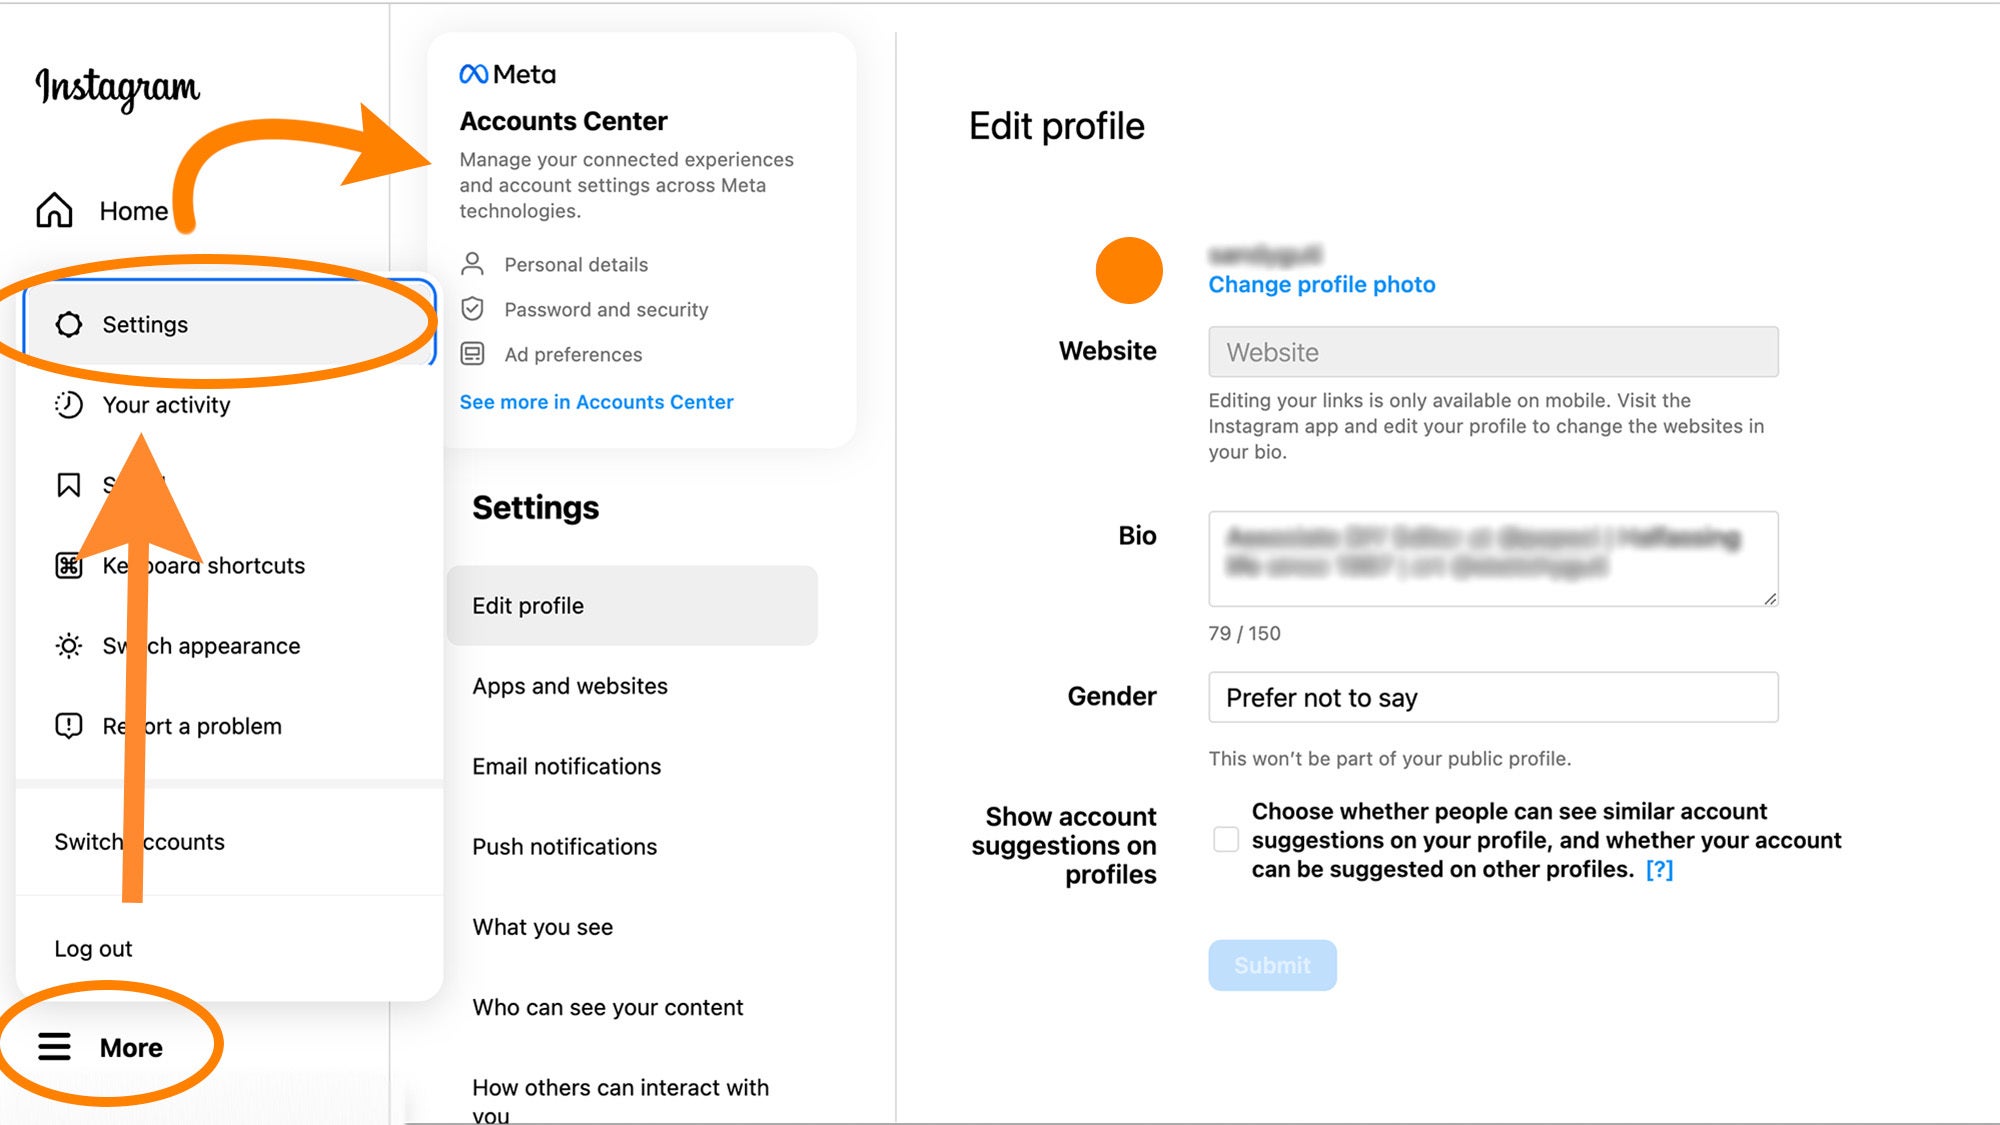
Step 2: Go to Your Profile Settings
Once you are logged in, click on your profile picture in the top right corner of the screen. This will take you to your profile page. From there, click on the gear icon next to the “Edit Profile” button. This will take you to your account settings.
Step 3: Select “Edit Profile”
On the account settings page, click on the “Edit Profile” button. This will take you to a page where you can make changes to your profile.
Step 4: Scroll Down and Click on “Temporarily Disable My Account”
Scroll down until you see the “Temporarily Disable My Account” option. Click on it to proceed with deactivating your account.
Step 5: Choose a Reason for Deactivating Your Account
Instagram will ask you to select a reason for deactivating your account from a drop-down menu. Choose the reason that best fits your situation.
Step 6: Re-enter Your Password
After selecting a reason, you will be prompted to re-enter your password to confirm the deactivation. This is a security measure to ensure that only you can deactivate your account.
Step 7: Click “Temporarily Disable Account”
Once you have entered your password, the “Temporarily Disable Account” button will become clickable. Click on it to confirm the deactivation of your account.
Step 8: Your Account is Now Deactivated
Congratulations, you have successfully deactivated your Instagram account! Your account will now be hidden from other users, and your photos, comments, and likes will not be visible. However, you can reactivate your account at any time by simply logging back in.
In conclusion, deactivating your Instagram account is a straightforward process that can be completed in just a few clicks. Keep in mind that this is only a temporary deactivation, and if you want to permanently delete your account, you can do so by following similar steps. We hope this guide has been helpful in assisting you with deactivating your Instagram account.In conclusion, learning how to deactivate Instagram can be a useful tool for managing your online presence and taking a break from social media. By following the simple steps outlined in this guide, you can easily deactivate your account and take a step back from the digital world. Remember to carefully consider your decision and take advantage of the temporary deactivation option if needed. With these tips, you can confidently deactivate Instagram and focus on other aspects of your life.
