Welcome to our guide on how to screen record on Mac! Screen recording is a useful tool for capturing videos and tutorials on your computer. Whether you’re a content creator, educator, or just want to save a video for later, knowing how to screen record on your Mac is essential. In this guide, we will provide step-by-step instructions on how to screen record on Mac, along with some helpful tips to make your recordings even better. Let’s get started!
Mastering Mac: A Comprehensive Guide on How to Screen Record on Your Mac
Introduction
Screen recording is a useful tool that allows Mac users to capture and save a video of their computer screen. It can be used for a variety of purposes, such as creating tutorials, recording presentations, or capturing gameplay. In this comprehensive guide, we will walk you through the steps of how to screen record on your Mac, as well as provide you with tips and tricks for making the most out of this feature.
Step 1: Understanding the Built-in Screen Recording Tool on Mac
MacOS has a built-in screen recording tool that allows you to easily record your screen without the need for any third-party software. To access this tool, go to your Applications folder, then navigate to the Utilities folder, and select “QuickTime Player”. Alternatively, you can use the Spotlight Search (command + space) and search for “QuickTime Player” to open it.
Step 2: Starting a Screen Recording
Once you have opened QuickTime Player, click on “File” in the menu bar, then select “New Screen Recording”. A small recording window will appear on your screen. Before starting the recording, you can adjust the recording settings by clicking on the arrow next to the record button. Here, you can select the quality of the recording, whether to record audio or not, and choose the microphone and camera input if needed.
Step 3: Recording Your Screen
To start recording, click on the red record button in the recording window. You can choose to record your entire screen by clicking anywhere on the screen, or you can click and drag to select a specific area to record. Once you are done recording, click on the stop button in the menu bar, or press command + control + escape on your keyboard.
Step 4: Saving and Editing Your Recording
After you have stopped the recording, a preview of your recording will appear in QuickTime Player. From here, you can save the recording by going to “File” in the menu bar and selecting “Save”. You can also use the editing tools in QuickTime Player to trim, split, or add annotations to your recording.
Tips and Tricks
– To record audio from your computer, make sure to select the correct microphone input in the recording settings. You can also use an external microphone for better audio quality.
– If you want to record a FaceTime call or any other app that uses your camera, make sure to select the camera input in the recording settings.
– You can use keyboard shortcuts to start and stop the recording. Press command + control + R to start recording and command + control + escape to stop.
– To make your recording more professional, consider using a screen recording software with advanced features such as video editing, annotations, and the ability to add a webcam overlay.
– If you want to record your iPhone or iPad screen, you can do so by connecting your device to your Mac and using the QuickTime Player to record it.
Conclusion
Screen recording is a powerful tool that can be used for various purposes on your Mac. With the built-in QuickTime Player, you can easily record your screen without the need for any additional software. Now that you know how to screen record on your Mac, you can start creating high-quality tutorials, presentations, and game recordings. Remember to use the tips and tricks mentioned in this guide to make your recordings more professional and engaging.
Screen Recording on Mac: The Ultimate Step-by-Step Tutorial
Screen recording on Mac is a useful feature for capturing your screen activity, whether you want to create a tutorial, record a presentation, or save a video call. With the built-in screen recording tool on your Mac, you can easily record your screen and even add audio commentary. In this step-by-step tutorial, we will guide you on how to use the screen recording feature on your Mac.
Step 1: Open QuickTime Player
The first step to recording your screen on Mac is to open QuickTime Player. You can find this application in your Applications folder or by using the Spotlight search function.
Step 2: Click on File and select New Screen Recording
Once QuickTime Player is open, click on “File” in the menu bar and select “New Screen Recording” from the drop-down menu. You can also use the keyboard shortcut “Control + Command + N” to open the screen recording window.
Step 3: Customize your recording options
A small recording window will appear on your screen. Before you start recording, you can customize your recording options by clicking on the small arrow next to the record button. From here, you can choose whether to record your entire screen or just a portion of it. You can also select whether to record audio from your computer or an external microphone.
Step 4: Start recording your screen
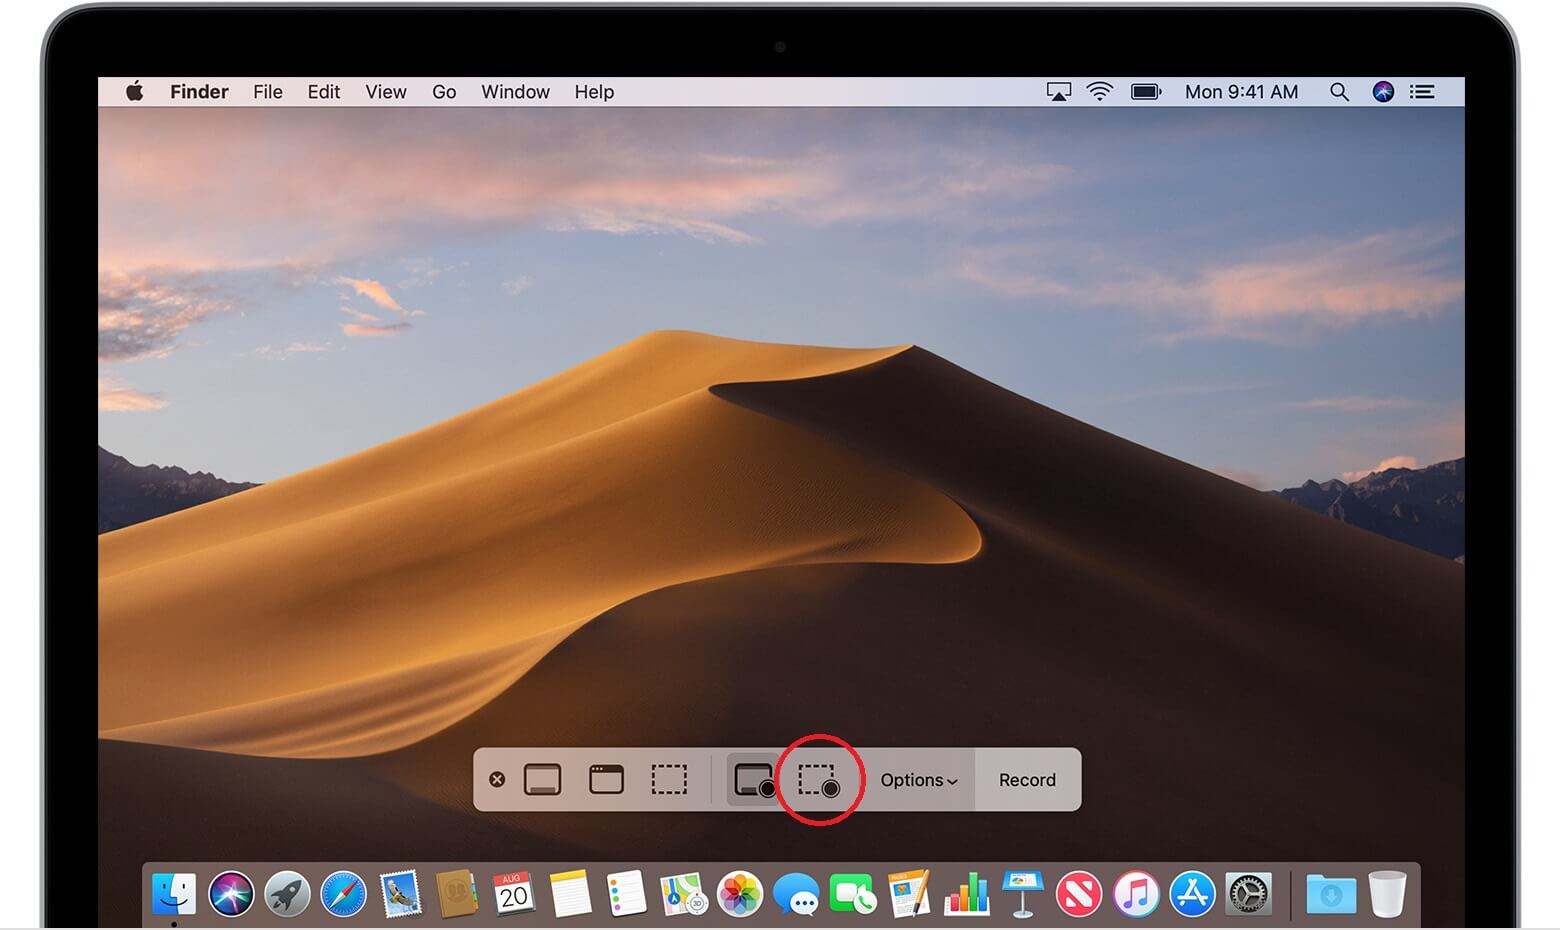
After you have customized your recording options, click on the red record button to start recording your screen. You will have a three-second countdown before the recording begins. You can also choose to click on the “Options” button to enable mouse clicks in your recording or show a floating thumbnail of your recording.
Step 5: Stop and save your recording
To stop your recording, click on the stop button in the menu bar or use the keyboard shortcut “Control + Command + Esc”. Your recording will automatically be saved as a .mov file. You can also choose to trim your recording by clicking on “Edit” in the menu bar and selecting “Trim”. This will allow you to remove any unwanted parts of your recording.
Step 6: Edit and share your recording
After you have stopped your recording, you can edit it by clicking on “Edit” in the menu bar and selecting “Trim” or “Split”. You can also add audio commentary by selecting “Edit” and then “Add Audio Commentary”. Once you are satisfied with your recording, you can share it by clicking on “File” and selecting “Share” from the drop-down menu.
Congratulations, you have successfully recorded your screen on your Mac! With this simple step-by-step tutorial, you can now easily create screen recordings for various purposes. Whether it is for work, school, or personal use, the screen recording feature on your Mac is a great tool to have.
Capture and Save: How to Screen Record on Mac with Ease
Screen recording allows you to capture and save anything on your Mac’s screen as a video file. This can be useful for a variety of purposes, from creating tutorials to recording gameplay. Fortunately, it’s easy to do on a Mac with the built-in screen recording feature. In this guide, we’ll walk you through the steps to screen record on your Mac with ease.
Step 1: Open the Screen Recording Tool
To access the screen recording tool on your Mac, open the QuickTime Player application. You can find this in your Applications folder or by using the Spotlight search function. Once the application is open, go to the “File” menu and select “New Screen Recording.”
Step 2: Configure Your Recording Settings
A small recording window will appear on your screen. Before you start recording, you can customize your settings by clicking on the arrow next to the record button. Here, you can choose to record audio from your computer’s microphone, show mouse clicks, and set a timer for your recording to start.
Step 3: Begin Recording
When you’re ready to start recording, click on the red record button. You can choose to record your entire screen or click and drag to select a specific portion to record. Once you’ve made your selection, click on the “Start Recording” button in the recording window.
Step 4: Stop and Save Your Recording
When you’re finished recording, click on the stop button in the menu bar or press “Command + Control + Esc” on your keyboard. A preview of your recording will appear, and you can choose to trim the beginning or end if needed. When you’re satisfied with your recording, click on the “File” menu and select “Save.”
Step 5: Choose Your File Format and Save Location
In the Save window, you can choose the file format for your recording. The default is “.mov,” but you can also select from other options such as “MP4” or “AVI.” You can also choose the location where you want to save your recording. Once you’ve made your selections, click on “Save” to save your recording to your chosen location.
And that’s it! You’ve successfully screen recorded on your Mac. Now you have a video file that you can use for whatever purpose you need. Just remember to delete the recording from your computer once you no longer need it to free up storage space.
Additional Tips for Screen Recording on Mac
– Make sure you have enough available storage space to record and save your video file.
– Consider turning off any notifications or alerts before you start recording to avoid interruptions.
– You can also use the shortcut “Command + Shift + 5” to access the screen recording tool on Mac.
– If you need to record audio from your computer, make sure your desired audio source is selected in your system preferences before starting the recording.
– You can also use third-party screen recording software for more advanced features and editing options.
In conclusion, screen recording on your Mac is a simple and useful tool for capturing and saving anything on your screen. Whether you’re creating tutorials, recording gameplay, or simply need to show someone how to do something on their computer, this feature makes it easy to do. Just follow the steps outlined in this guide, and you’ll be screen recording like a pro in no time.In conclusion, knowing how to screen record on Mac can greatly enhance your productivity and allow you to easily share important information with others. By following the simple steps outlined above, you can easily record your screen and create high-quality videos or tutorials. With this valuable skill in your arsenal, you can elevate your online presence and effectively communicate your ideas to a wider audience. So don’t wait any longer, start screen recording on your Mac today and see the benefits for yourself!
